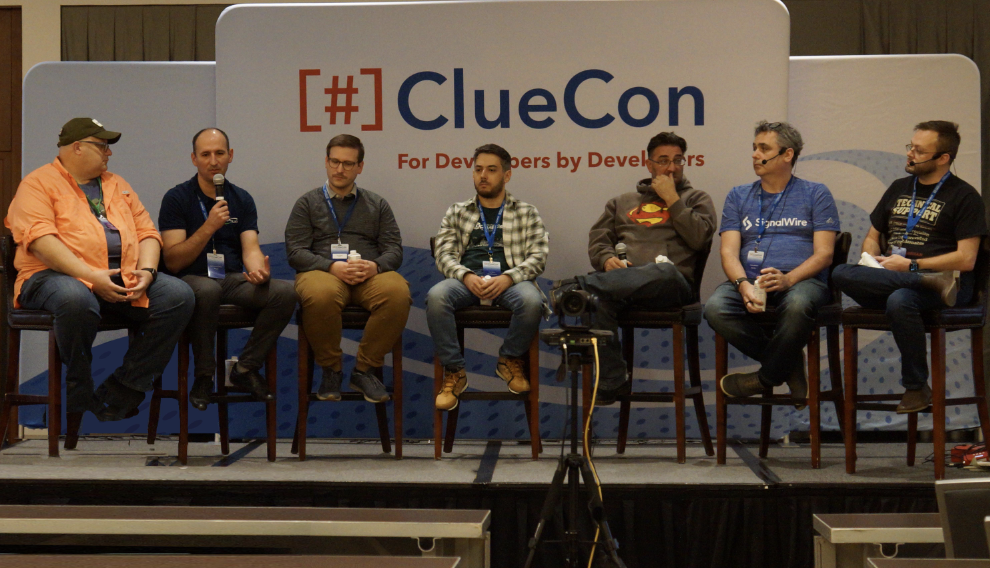
Getting Started Guide
From FreeSWITCH Wiki
The purpose of the following page is to instruct new users on how to configure FreeSWITCH™ in a basic way. It is also intended to provide people with a basic understanding of the configuration files and how they are processed. If FreeSWITCH™ is not already installed on your system you should read the Installation Guide. This guide is not intended to allow for more than a default configuration.
Contents |
FreeSwitch layout
FreeSWITCH™ has a modular design. This design allows it to be extended without breaking functionality or requiring massive recoding efforts. Each module provides specific functionality, often commands that are related are grouped into one module. You will need to enable the modules that you desire, based on their function. By default FreeSWITCH™ comes with a good set of modules loaded, to enable most basic functionality.
Read up on the default config for more information.
Configuration
The following sections will show you each step that you will have to take to get a functional system.
Firewall
If you are going to route traffic across your network, you need to ensure that you do not have a firewall blocking traffic on the specified network paths. Commonly firewalls are installed at egress points, where your local network connects to the internet. This is not always the case in some corporate environments. If you are not responsible for your network, you may wish to contact the group or individuals that are for assistance.
Information they may need to enable traffic would include the port numbers. Various protocols use different ports for different things. Some you need bi-directional connectivity, some you only need outbound. Depending on your call scenario you may only need to allow connections that are initiated by your system. If you have any problems with protocols not working, it is recommended that you disable your firewall to the FreeSWITCH™ system and place a test call and see if the problem persists. Commonly people who have problems have a misconfigured firewall that is creating the problem.
| FireWall Ports | Network Protocol | Application Protocol | Description |
|---|---|---|---|
| 1719 | UDP | H.323 Gatekeeper RAS port | |
| 1720 | TCP | H.323 Call Signalling | |
| 3478 | UDP | STUN service | Used for NAT traversal |
| 3479 | UDP | STUN service | Used for NAT traversal |
| 5002 | TCP | MLP protocol server | |
| 5003 | UDP | Neighborhood service | |
| 5060 | UDP & TCP | SIP UAS | Used for SIP signalling (Stardard SIP Port, for default Internal Profile) |
| 5070 | UDP & TCP | SIP UAS | Used for SIP signalling (For default "NAT" Profile) |
| 5080 | UDP & TCP | SIP UAS | Used for SIP signalling (For default "External" Profile) |
| 16384-32768 | UDP | RTP/ RTCP multimedia streaming | Used for audio/video data in SIP and other protocols |
Configuration Files
FreeSWITCH™ configuration data is stored in XML format. These files are located in the conf directory under the FreeSWITCH™ install directory. By default on a Unix-like system this will be /usr/local/freeswitch/conf. There are preprocessor markup tags that tell the configuration parser to perform tasks, such as including other files, which are carried out before the XML is parsed.
| Folder | Description |
|---|---|
| autoload_configs | This configuration files are loaded automatically into FreeSWITCH. They contain information about all but some few core modules. |
| dialplan | This is the place where you setup your dialplan. There are some examples in here with what you may do. |
| directory | The directory contains all users that may register and use freeswitch as it's pbx. |
| jinge_profiles | Jingle is the mod that FS uses to handle XMPP. Profiles tells FS how to use the protocol. Each profile has it's own ip port. |
| lang | Tells FS how to say currency etc in different languages |
| mrcp_profiles | MRCP is used to allow FreeSWITCH to use speech recognition and TTS |
| sip_profiles | Tells FS how to talk sip. Each profile has it's own port. |
Configuring FreeSWITCH
This guide aims to explain the default configuration layout and how you configure it to your likings. Read up on the default config for more information.
This layout is in no way required, you can minimize the configuration to just one file if needed. The main config file is called freeswitch.xml, you don't need to change it in any way, it just loads all other config files.
vars.xml
vars.xml is used to define a couple of variables that is used system wide.
See Config_vars.xml for example.
In the default configuration the vars.xml file is used to define some preprocessor variables. In a first time setup you will most likely want to set:
<X-PRE-PROCESS cmd="set" data="outbound_caller_name=FreeSWITCH"/>
<X-PRE-PROCESS cmd="set" data="outbound_caller_id=8777423583"/>
<X-PRE-PROCESS cmd="set" data="call_debug=false"/>
irectives for use in other portions of the configuration.
The default port of Freeswitch is also defined in
<param name="sip-port" value="5060" />
autoload_configs
autoload_configs is a directory where a lot of the freeswitch configuration resides. It is a directory located in $PREFIX/conf/autoload_configs. The default freeswitch.xml preprocesses xml files matched by the glob conf/autoload_configs/*.xml
modules.conf.xml
See modules.conf.xml for an example of modules.conf.xml.
modules.conf.xml tells freeswitch which modules to load. There are certain modules required for operation so you should not edit this file unless you know that you wish to add or remove a specific module
sofia.conf.xml
See Sofia_Configuration_Files for an example sofia.conf.xml.
mod_sofia is used to create sip endpoints in FreeSWITCH. If you are familiar with Asterisk, each profile in mod_sofia is similar to chan_sip, though much more powerful.
The sofia.conf.xml file includes other xml files to define multiple "profiles". A profile is a SIP UA (an endpoint), which communicates with other SIP endpoints.
sip_profiles
The default profiles are "internal" "nat" and "external", each serves a special purpose so it would be wise to understand what they do. The default profiles are located in:
$PREFIX/conf/sip_profiles/PROFILE_NAME.xml -- where PROFILE_NAME is the name of the profile.
internal
See Config_default.xml or $PREFIX/conf/sip_profiles/default.xml
The internal (formerly "default") sip profile is named default and is configured to listen on the primary IP address of the machine (unless you set $${domain} to something else in vars.xml) on port 5060 (the default sip port). The internal sip profile *does* authenticate calls and is *not* suitable for configuring trunks to providers, in most cases.
The internal profile should be used if you intend on handling registration for sip clients (ie a SIP registrar). You may wish to skip to the section Getting_Started_Guide#directory to configure additional sip clients.
The dialplan for this profile (per-default) is defined in the default context
nat
See Config_nat.xml or $PREFIX/conf/sip_profiles/nat.xml
The nat profile is configured to bind on the servers primary IP address on port 5070.
The nat profile is used for anonymous calling.
The dialplan for this profile (per-default) is defined in the public context
external
See Config_external.xml or $PREFIX/conf/sip_profiles/external.xml
The external (formerly "outbound") profile handles outbound registrations, to a SIP provider. The SIP provider sends calls to you, and you send calls to your provider, through the external profile.
The external profile allows anonymous calling, which is required as your provider will never authenticate with you to send you a call.
In order to secure your FreeSwitch it is wise to link your outbound profile to a dialplan context other than 'default', which in the default configuration is the where authenticated users are placed.
The dialplan for this profile (per-default) is defined in the public context
dialplan
The FreeSWITCH dialplan is a full-featured, XML-based call-routing mechanism. (There also exists support for Asterisk-like dialplans as well as really fancy real-time and/or back-end database-driven dialplans.) The best place to get started in learning about the FreeSWITCH dialplan is the Dialplan page here on the wiki. It discusses the basics of the FreeSWITCH dialplan. If you need an XML primer check out the information on the Basic_XML page which will get you pointed in the right direction. There are two other important resources for you to learn more about the diaplan: the small-but-growing Dialplan_Recipes page as well as the default dialplan that comes with a standard FreeSWITCH installation.
It is recommended that you compile FreeSWITCH with the default configuration and make sure it works before you start making customizations. Note that the default config files, including the default.xml dialplan, are still being updated. It makes sense to put your custom diaplan entries into the extensions subdirectory under conf/dialplan. You may create one or more XML files in this subdirectory, all of which will be included in the dialplan thanks to an "include" directive in the default.xml file. By keeping your customized extensions separate from default.xml you will be able to update default.xml without having to re-enter your custom extensions.
Some common extensions for testing
- 1000, 1001, ..., 1019 - Generic SIP extensions
- 5000 - demo IVR (requires sounds and music files to be installed)
- 9995 - five second delay echo test
- 9996 - standard echo test
- 9999 - music on hold (requires music files to be installed)
directory
See Config_directory.xml for a sample configuration.
The directory holds authentication credentials for other sip endpoints that will register to freeswitch (most commonly users). The directory configuration default is configured to process the glob $PREFIX/conf/directory/default/*.xml by the configuration included in freeswitch.xml $PREFIX/conf/directory/*.xml.
This may seem confusing but the default will work in most cases. Feel free to look at the examples in: $PREFIX/conf/directory/
User Configuration
see Config_1000.xml for a simple (1000.xml) configuration of a user (endpoint) which will register to freeswitch.
Sample Gateway Configuration
See Voicepulse.xml for a gateway configuration of how a user can register with a voip provider.
outbound registrations to providers can also be made in the outbound profile. see Clarification:gateways this page for a clarification
Dialing out via Gateway
Add the following to default.xml (in prefix/conf/dialplan) for 11 digit dialing (US) via your newly created gateway configuration above. Remember, the default configuration provided by FreeSWITCH does not include a diaplan rule for outbound calls via the gateway you've defined. You will need to add something similar to the following.
<!-- Dial any 10 digit number (2223334444) or 1+10 number (12223334444) here -->
<extension name="Long Distance - voicepulse">
<condition field="destination_number" expression="^(1{0,1}\d{10})$">
<action application="set" data="effective_caller_id_number=12223334444"/>
<!-- If your provider does not provide ringback (180 or 183) you may simulate
ringback by uncommenting the following line. -->
<!-- action application="ringback" /-->
<action application="bridge" data="sofia/gateway/voicepulse/$1@nyc-primary.voicepulse.com"/>
</condition>
</extension>
Receiving an inbound call from a Gateway
Add the following to public.xml (in prefix/conf/dialplan) to receive inbound calls via your newly created gateway configuration above. Make sure to set destination_number to a DID defined for this gateway. This will route all inbound calls to extension 1001. Remember, you can have multiple endpoints register to one account ( See Multiple Registrations ). You will need to add something similar to the following.
<extension name="Voicepulse"> <!-- your provider or any name you'd like to call it -->
<condition field="destination_number" expression="15555551212"> <!-- your DID for this gateway-->
<action application="transfer" data="1001 XML default"/>
</condition>
</extension>
Running FreeSwitch
Starting FreeSWITCH™ is done from the command-line. The location of the executable varies depending on your system.
Starting in Unix-based Systems
Now that you have compiled and configured FreeSWITCH™ its time to place a test call to ensure that everything is working so far. To start FreeSWITCH™ change to the bin subdirectory under the FreeSWITCH™ installation directory, and run FreeSWITCH™. In a unix-like system that might be:
REDHAT CENTOS Startup Scripts:
cp build/freeswitch.init.redhat /etc/init.d/freeswitch chmod 755 /etc/init.d/freeswitch
Starting in Windows-based Systems
The Visual Studio project runs via an executable located under the debug or release folder of your project's directory tree (depending on how your project was built). On a debug build of the Windows system start FreeSWITCH™ as follows:
The FreeSWITCH™ command line will be availeble after successful loading of the application.
Command Line Parameters
These are the optional arguments you can pass to freeswitch:
-help -- this message
-nf -- no forking
-hp -- enable high priority settings
-stop -- stop freeswitch
-nc -- do not output to a console and background
-conf [confdir] -- specify an alternate config dir
-log [logdir] -- specify an alternate log dir
-db [dbdir] -- specify an alternate db dir
Shutting Down FreeSWITCH™
To exit the FreeSwitch CLI, simply type 'shutdown' or '...'. Note, this will shutdown FreeSwitch. If you do not wish to shutdown FreeSwitch, it is suggested to start the process inside of a "screen" session, in windows FreeSWITCH™ may be started as a service. It is not recommended that you start FreeSWITCH™ as a service until you are certain your configuration is valid. Also if started from a remote login session (IE SSH) it is not advised to terminate the connection with FS left in the foreground.
Some stuff to try out!
The optimal way of testing is to get a pair of SIP phones and try out features via the default dialplan. If you're already familiar with asterisk, you could also start out by Connecting Freeswitch And Asterisk
- Register two phones to FreeSWITCH with two different extension numbers
- Let's assume for the example that you have your SIP phones registered as extensions 1000 and 1001.
- You can use extension numbers 1000 thru 1019 with a password of 1234 (the default voice-mail password is the same number as the extension {Ex: x1000 / vm-pw1000}.
A sample configuration with X-Lite is shown below:
Once you've done that, you can try out a bunch of features already setup in the test dialplan.
Basic Calling
- Call between 1000 and 1001 by dialing the respective extension
- Call your own extension number to login to your voicemail box
- 870 - Redial last called # from this extension
- *69 - Call back the last person to call this extension
- 8+[ext] - Place an intercom call to extension [ext]. If no answer, it does not go to voicemail but just keeps ringing. Some phones have additional functionality for intercom calls.
Advanced Calling Features
- 88+[ext] - Eavesdrop on extension [ext] (ex: 881001). That extension must be on an active call. Once connected, you can listen to the call without being heard, or you can...
- Press 1 to barge in with the distant party
- Press 2 to barge in with the local party
- Press 3 to barge in on both parties
- 5900 - Park a call in a hold queue. (First-in-first-out style)
- 5901 - Pickup a call parked in queue (that was put there via 5900)
Group Assignments
The below functions involve the idea of keeping a database/table of which extensions belong to one of 100 groups (numbered 00-99).
- 80+[group] - Delete this extension from calling group #[group] (can be two digits 00-99). A beep tone confirms the function worked.
- 81+[group] - Add this extension to calling group #[group] (can be two digits 00-99). A beep tone confirms the function worked.
- 82+[group] - Simultaneously ring all extensions in group #[group]. The first person to answer will be connected to you automatically.
Conferencing
- 30+[conf] - Join conference #[conf] - 8-bit quality
- 31+[conf] - Join conference #[conf] - 16-bit quality
- 32+[conf] - Join conference #[conf] - 32-bit quality
- 9888 - Join the FreeSwitch conference via a SIP Internet connection (8-bit)
- 91616 - Join the FreeSwitch conference via a SIP Internet connection (16-bit)
Note: Conference rooms are unique for the bit-level you choose (i.e. 3000 for conference room 00 will not join with participants in 3100 which is also conference room 00. They are different conferences)
Interactive Voice Response
- 5000 - IVR demo
Other Tests
- 9995 - Echo test (5-second delay before returning echo)
- 9996 - Echo test (real-time)
- 9997 - Play milliwatt tone
- 9998 - Tetris, via tone streaming
- 9999 - Test Music On Hold out (if you installed sound files)
Advanced
Preprocessor Commands
The FreeSWITCH™ configuration supports preprocessor commands reminiscent of (but not matching) apache server-side includes: #comment, #include and #set.
In addition to the pre-processor PIs, which may appear anywhere, the freeswitch.xml file has a root element of "document", and all its children are "section" elements, with "name" attribute values being one of:
Note that preprocessor variables set with a #set PI are unrelated to "channel variables", defined with the <variable> element. Those variables are only expanded within channels.
Preprocessor commands are included in XML style comment brackets. Even though they appear commented to an XML parser, they are still processed. The comment characters are required or they will not be processed. An example would be:
freeswitch.xml
This is the main configuration file, and the only one that has a fixed name. When you start FreeSWITCH™ it will locate this file and process it. The default freeswitch.xml file includes other files to allow for easier maintainence of configuration data. The default configuration of most of these files is suitable for first time users, until you become more familiar with FreeSWITCH™ it is advised that you leave them to their default settings.
freeswitch.xml is divided into multiple sections, and each section is used by a different component in FreeSWITCH™. The sections are as follows:
- The "configuration" section has children for switch.conf and modules.conf which are used by the core, as well as a child for each module in use.
- The dialplan section defines which action to invoke when a call arrvies to the switch.
- The directory defines the users that can connect to the switch (user agents).
- The phrases section defines where freeswitch can find the sound files, and if it can use any TTS engines.
The structure below "document" and "section" varies according to the parent. There is currently no dtd/relaxng/xmlschema available to validate the file, though since it does not use xml mechanisms for inclusion that would be an obstacle to true validation (and the limited xml parser used by FreeSwitch doesn't implement any of the XML standard mechanisms such as external entities or XInclude). XML namespaces are not currently used. There is no application-level versioning within the file.
How the configuration files are parsed
Within the name="configuration" section, all XML children are "configuration" elements, each with a specific name attribute value. It is a matter of personal taste whether you want to manage your configuration with many individual included files, or one big xml file with everything in it. FreeSwitch ships with starter files for both approaches: freeswitch.xml and freeswitch_combined.xml (which you would have to rename as "freeswitch.xml"). The starter "freeswitch.xml" works with a separate file X.conf.xml which is #include-ed for each "configuration" child.
Example freeswitch.xml
Below is a snippet freeswitch.xml file. Of course, the bulk of the configuration is found in the included files.
<?xml version="1.0"?>
<document type="freeswitch/xml">
<X-PRE-PROCESS cmd="include" data="vars.xml"/>
<section name="configuration" description="Various Configuration">
<X-PRE-PROCESS cmd="include" data="autoload_configs/*.xml"/>
</section>
<section name="dialplan" description="Regex/XML Dialplan">
<X-PRE-PROCESS cmd="include" data="dialplan/*.xml"/>
</section>
<!-- mod_dingaling is reliant on the vcard data in the "directory" section. -->
<!-- mod_sofia is reliant on the user data for authorization -->
<section name="directory" description="User Directory">
<X-PRE-PROCESS cmd="include" data="directory/*.xml"/>
</section>
<!-- phrases section (under development still) -->
<section name="phrases" description="Speech Phrase Management">
<macros>
<X-PRE-PROCESS cmd="include" data="lang/*/*.xml"/>
</macros>
</section>
</document>
Preprocessor Variables
For now, do not worry about all of the configuration properties, this guide will show you the minimum required to get a running FreeSWITCH™ system. After you have verified your installation you may then configure the system in more detail.
The first thing you should do is review conf/vars.xml and conf/freeswitch.xml. For now just make note of the preprocessor variables.
<X-PRE-PROCESS cmd="set" data="bind_server_ip=auto"/> <X-PRE-PROCESS cmd="set" data="global_codec_prefs=G722,PCMU@20i,PCMA@20i"/>
- "bind_server_ip" Can be an ip address, a dns name, or "auto".
- "global_codec_prefs" has a default of G.711 u-law. You can probably leave this alone, unless you need to change it to another codec, but most VoIP equipment will support this codec.
hint: If you need to troubleshoot your configuration, the log/freeswitch.xml.fsxml file contains the entire pre-processed freeswitch.xml file. (For testing and troubleshooting you could replace the freeswitch.xml file with this copy.)
hint2: If you have a [multihomed NIC] (Single Link, Multiple IP address) then remember that you may have to set a pre-process variable in the vars.xml file.
<X-PRE-PROCESS cmd="set" data="local_ip_v4=<your ip address>"/>
What FreeSwitch cannot do
If you want to know what FreeSwitch cannot do, refer to this page: What FreeSwitch cannot do
Asterisk Rosetta Stone
Rosetta stone is a page of common Asterisk -> FreeSWITCH translations

